I’m a Seoul native, and lately I don’t have to look far to see it: the growing wave of global interest in K-culture has brought more international visitors to my city than ever before. Seoul is where I spend most of my daily life, and these days it’s common to hear several different languages on my morning commute — something that felt much rarer just a few years ago.
It brings back my own memories of traveling abroad. Landing in an unfamiliar country and trying to do things that are second nature back home is genuinely hard. Tasks that feel automatic in your own daily life — finding your way, buying a ticket, reading a sign — can suddenly feel intimidating in a new place. And behind the glossy, brochure-perfect version of a trip, there are practical things every visitor should know in advance: how to search for a destination, how to actually get there, and what to do if something goes wrong — from a small mishap to needing a hospital.
That’s why I’m starting this blog series: practical, honest guides to help visitors to Korea travel a little more comfortably, enjoy their time more fully, and go home with good memories of this country.
The first topic is the most fundamental one — how to actually use the Seoul subway — illustrated with photos I took this morning on my own commute to a conference. Later in this series I’ll also cover the map apps Koreans actually use day to day (Kakao Map and Naver Map), since they matter here more than most visitors expect.
Why the Seoul Subway Is Your Best Option
Seoul’s subway network is one of the largest and most efficient in the world — more than 20 interconnected lines covering the entire metropolitan area, air-conditioned, frequent, inexpensive, and almost always faster than a taxi during the day. Learn a handful of habits below, and you can get almost anywhere in the city with confidence, no Korean required.
Step 1: Get Familiar With the Map First
Before you head underground, it helps to study the map above ground, where you have room to think and zoom in on your phone.
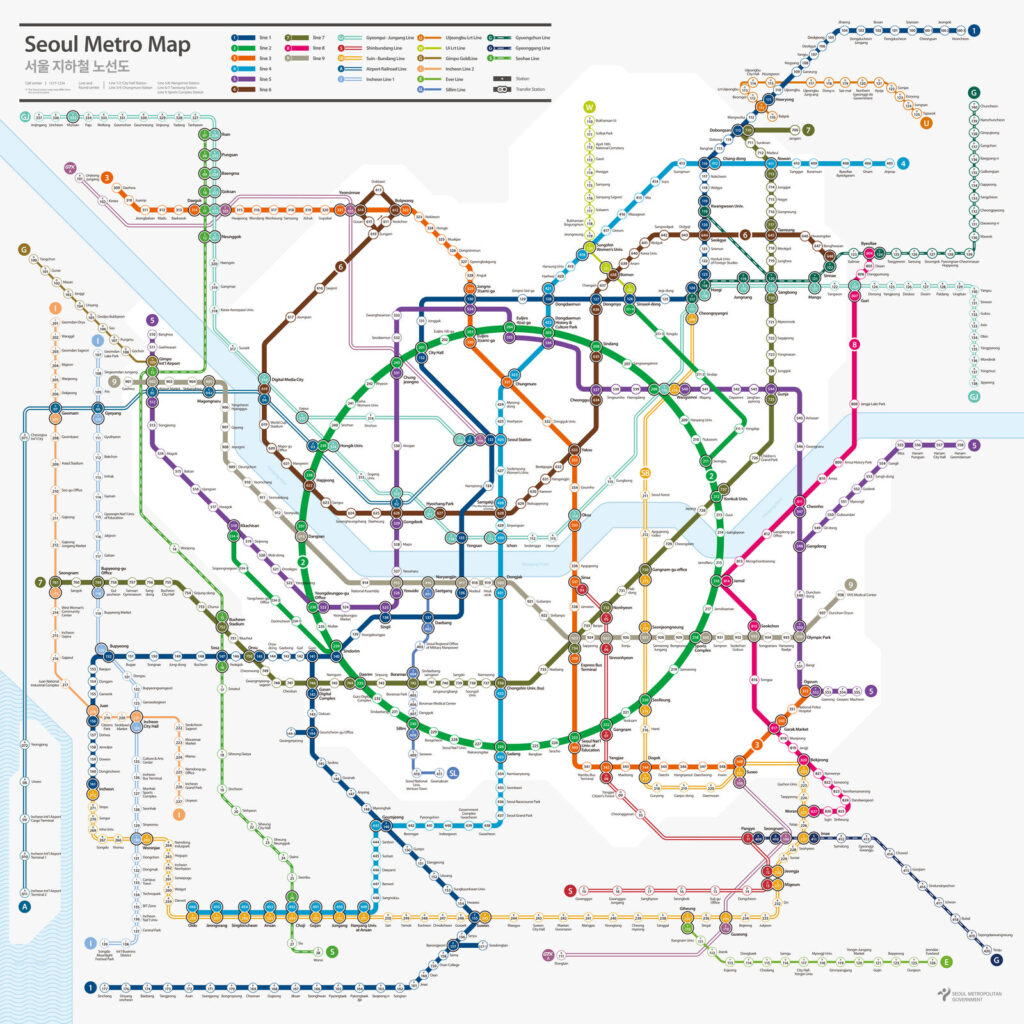
The full Seoul Metro map — every line has its own color and number.
A few things that make the system click once you know them:
Every line has a color and a number (Line 1 is dark blue, Line 2 is green, and so on). Locals refer to lines by number, so saying “Line 2” will get you further than describing a color.
Every station has a number too (for example, Gangnam Station is 222 on Line 2). If a station name is ever hard to pronounce or hear, the number is a reliable backup.
Transfer stations are marked with a double circle on the map — that’s where you can switch lines without leaving the paid zone.
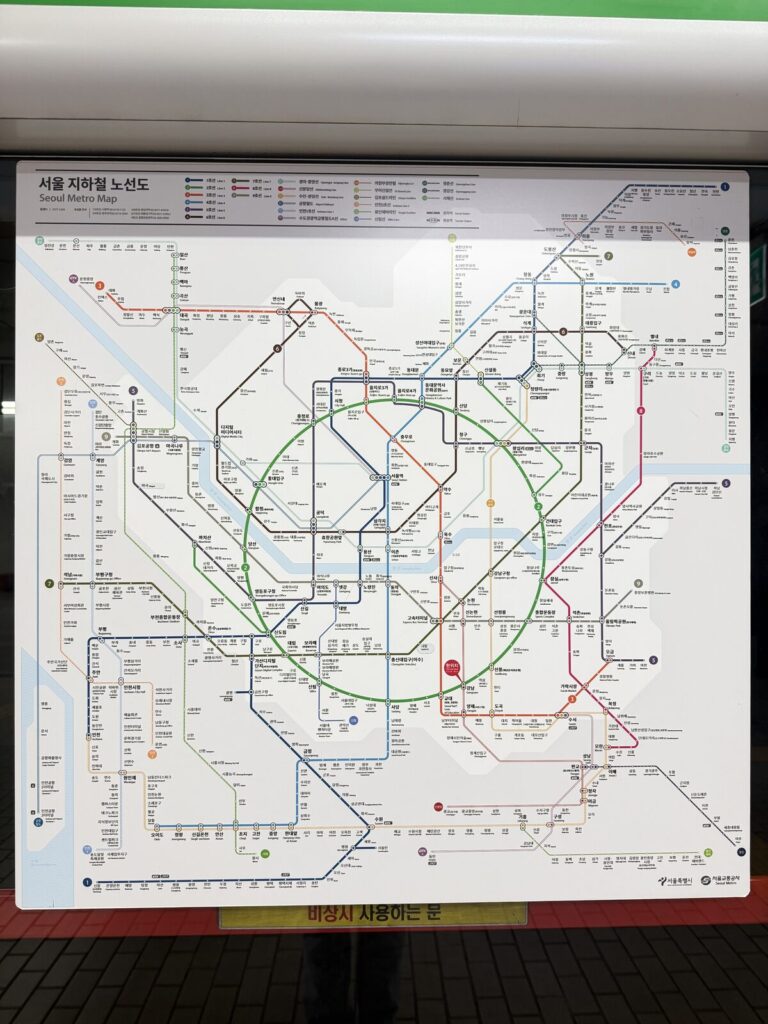
You’ll also see large printed versions of this map posted inside stations, usually near the platform, with a red “you are here” marker — handy for a quick reality check mid-journey.
A station map posted near the platform, with a ‘you are here’ marker.
Step 2: Get a Transit Card (Don’t Rely on Paper Tickets)
You can buy a single-journey paper ticket for each ride, but almost no one does — a rechargeable transit card (commonly called a T-money card) is cheaper, faster, and works on subways, buses, and even some taxis nationwide.
Where to buy one: Convenience stores (GS25, CU, 7-Eleven, Ministop) inside or near almost every station, or from the ticket machines themselves.
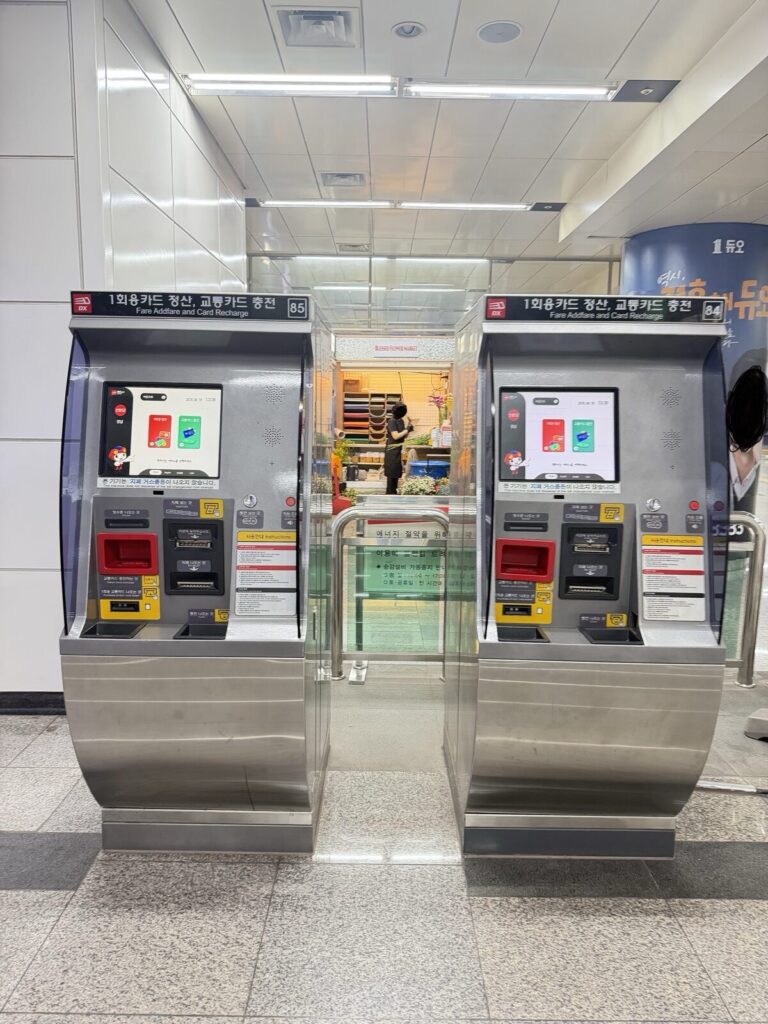
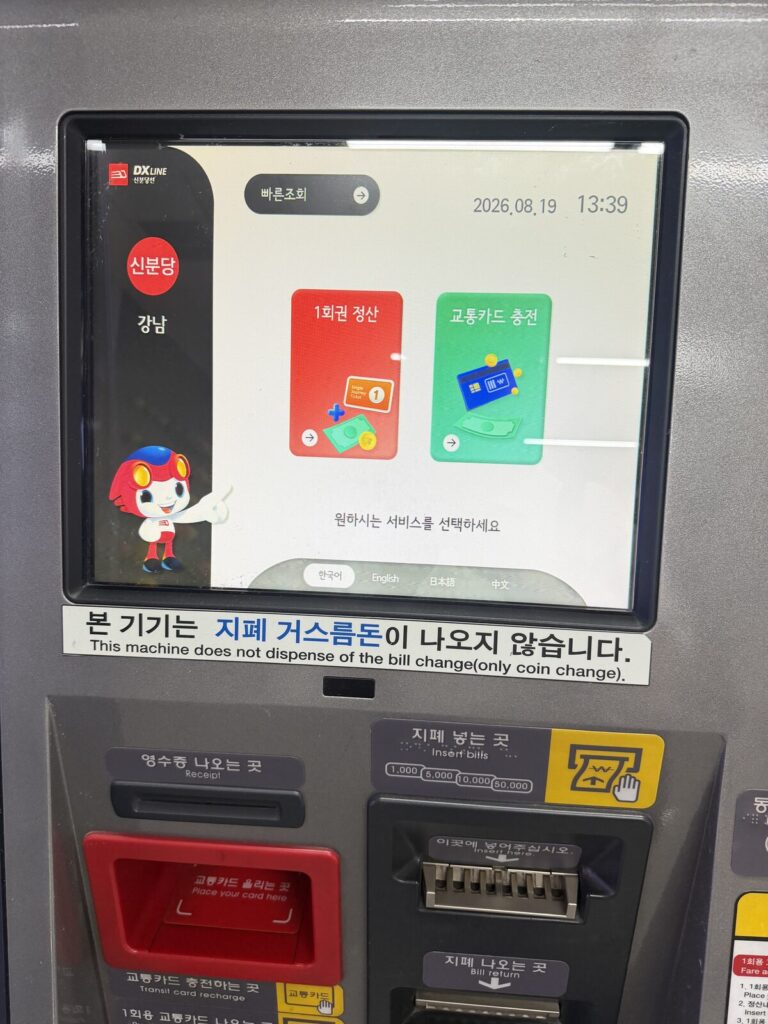
How to recharge it: Insert cash into a machine like the one below, tap your card on the reader, and select “교통카드 충전” (Recharge Transit Card). Machines accept 1,000 / 5,000 / 10,000 / 50,000 won bills.
Fare and transit card recharge machines at the station entrance.
One very practical warning, printed right on the machine: these machines don’t give bill change — only coin change. Feed in close to the exact amount you need, or be ready to receive the difference in coins. (Feed in close to the exact amount you need (1,000₩ or 10,000₩ bills are best). If you insert a 50,000 won bill to top up a small amount, you will literally receive a heavy handful of coins in return.)
The recharge machine’s touchscreen supports Korean, English, Japanese, and Chinese.
Tap your language in the bottom corner first, then choose between:
1회권 정산 / Single Journey Ticket — a one-time paper ticket. You’ll pay a small refundable deposit, returned when you drop the used ticket into a slot at your exit gate.
교통카드 충전 / Transit Card Recharge — top up your T-money balance. This is the option you’ll use almost every time.
Step 3: Tap In at the Gates
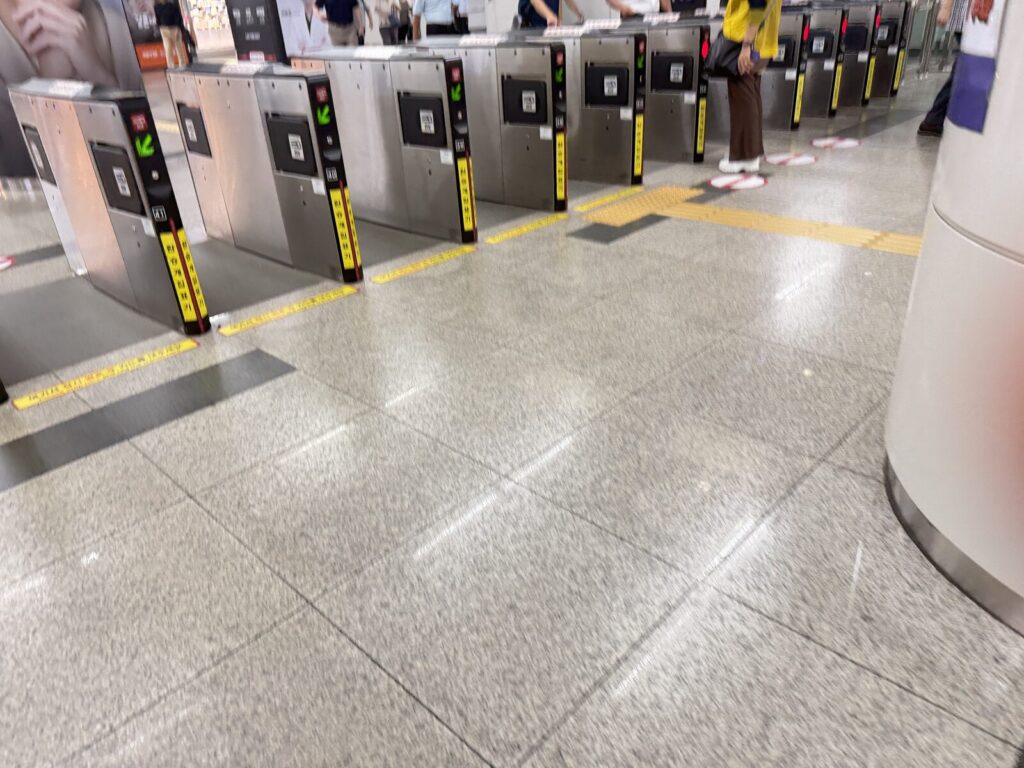
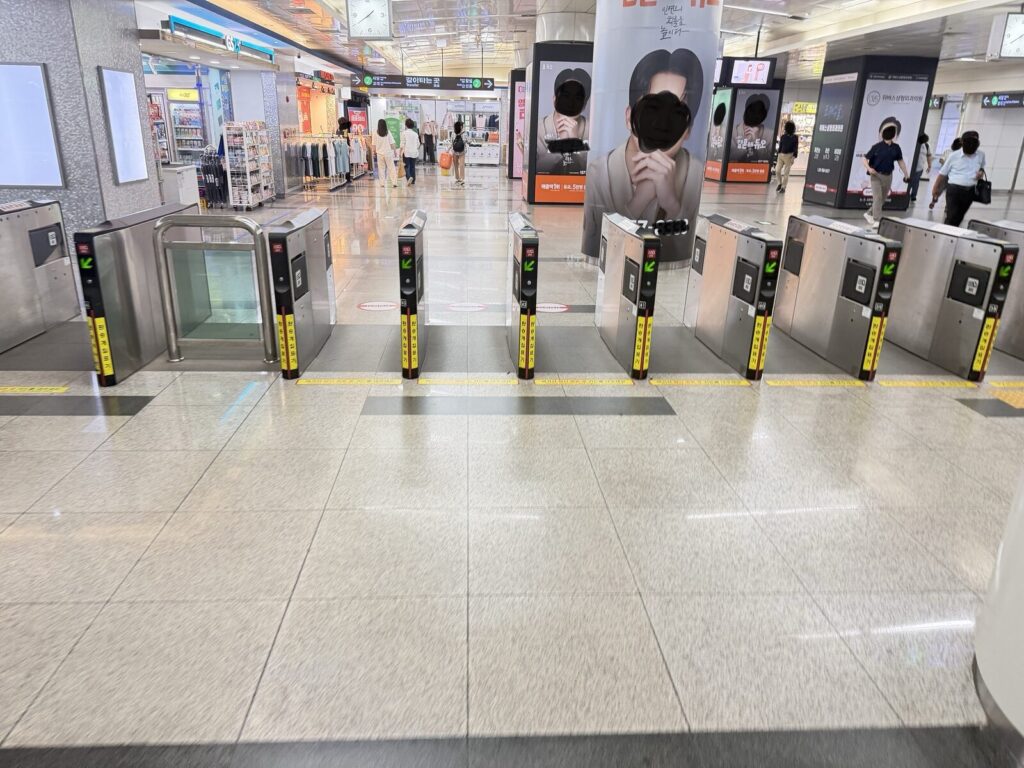
Once your card has balance, head to the turnstile gates. Tap your card flat on the reader — a green arrow and a beep mean you’re through; a red light means insufficient balance or an invalid tap, so try again or top up first. Crucial tip: Unlike subway systems in some other global cities, you must tap your card both when you enter AND when you exit. Don’t put your card away while riding!
Turnstile gates — tap your card and watch for the green arrow.
Notice the yellow textured strips on the floor — these are tactile guide paths for visually impaired passengers, standard throughout Korean stations. It’s good etiquette not to stand on them.
Many stations have a convenience store right next to the gates.
You’ll often find a convenience store, pharmacy, or small shops right at the gate area — useful if you need a card, a snack, or forgot to bring cash.
Step 4: Follow the Signs to Your Platform and Exit
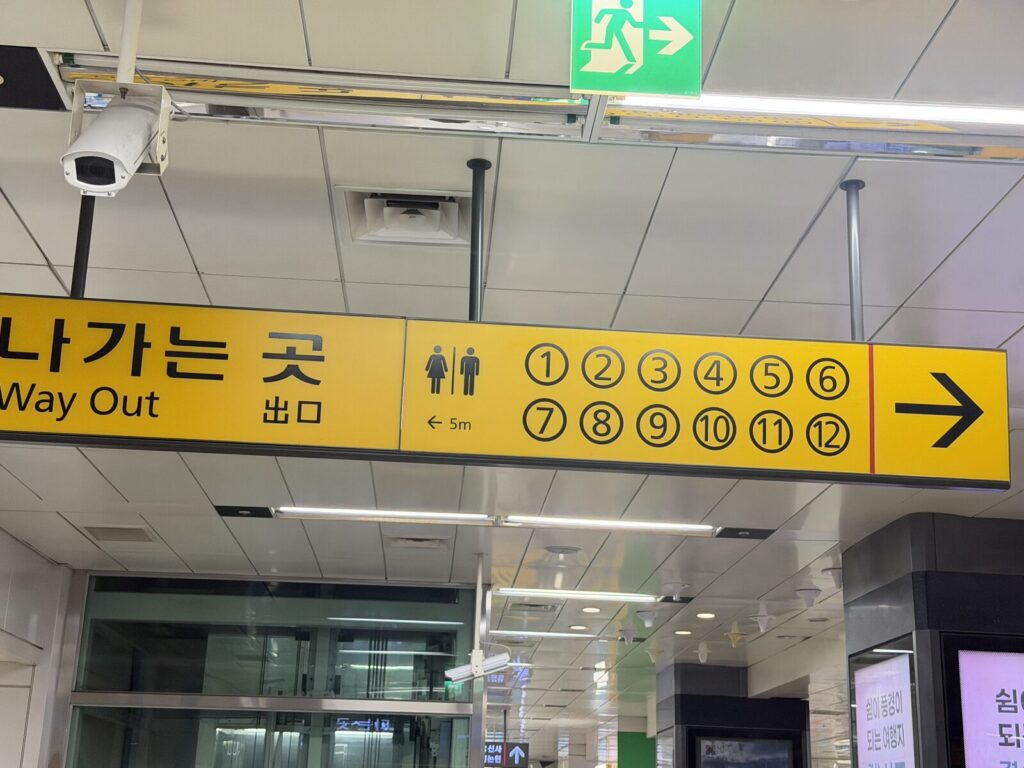
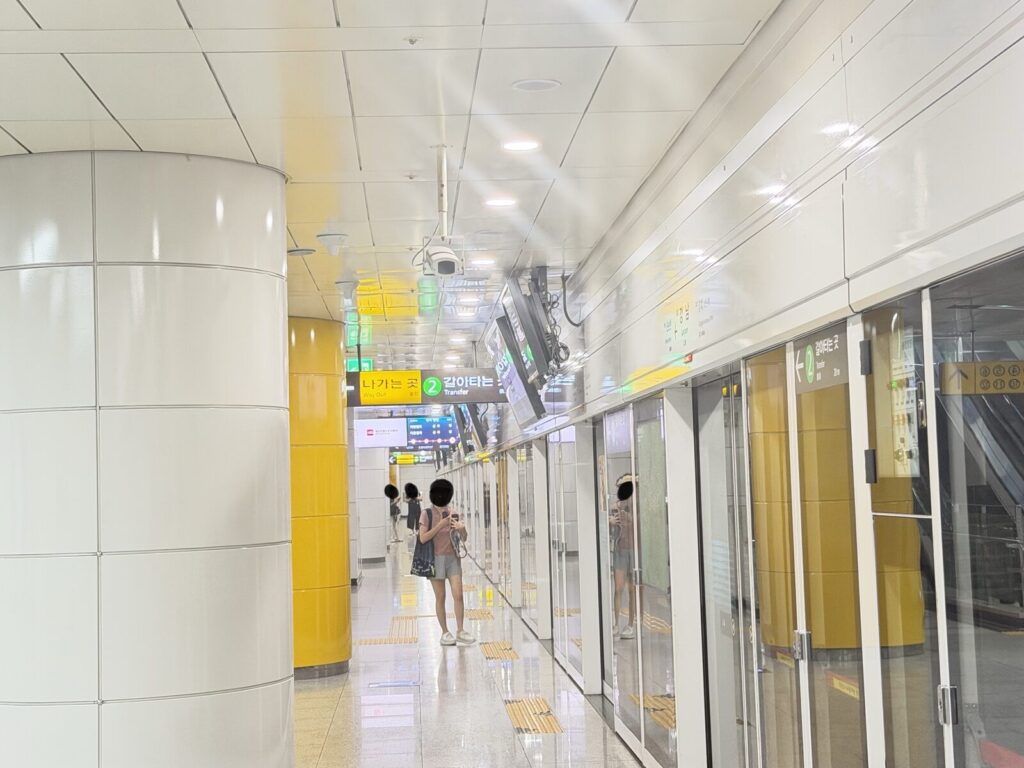
Korean stations are extremely well signed in English, but the system takes a moment to learn. Overhead signs point you toward 나가는 곳 / Way Out (exits, numbered 1, 2, 3…) and 환승 / Transfer (a green icon showing which line and how far to walk).
Exit signs are numbered — and those numbers matter more than you’d think.
This numbered exit system matters more than it looks — in Korea, addresses and meeting points are very often given as “Exit 3” or “Exit 10,” not a street name. When you make plans with a friend, join a tour, or even book a restaurant, expect an exit number to be part of the directions.
Following the ‘Way Out’ and ‘Transfer’ signage toward the next line.
Step 5: Wait Behind the Platform Screen Doors
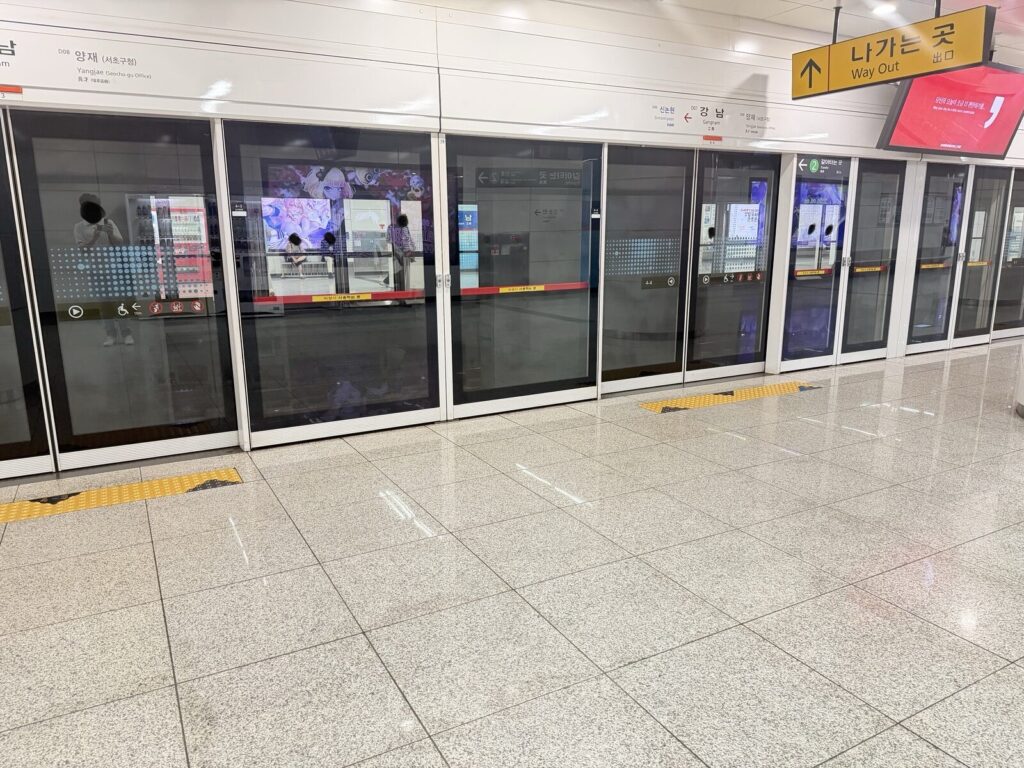
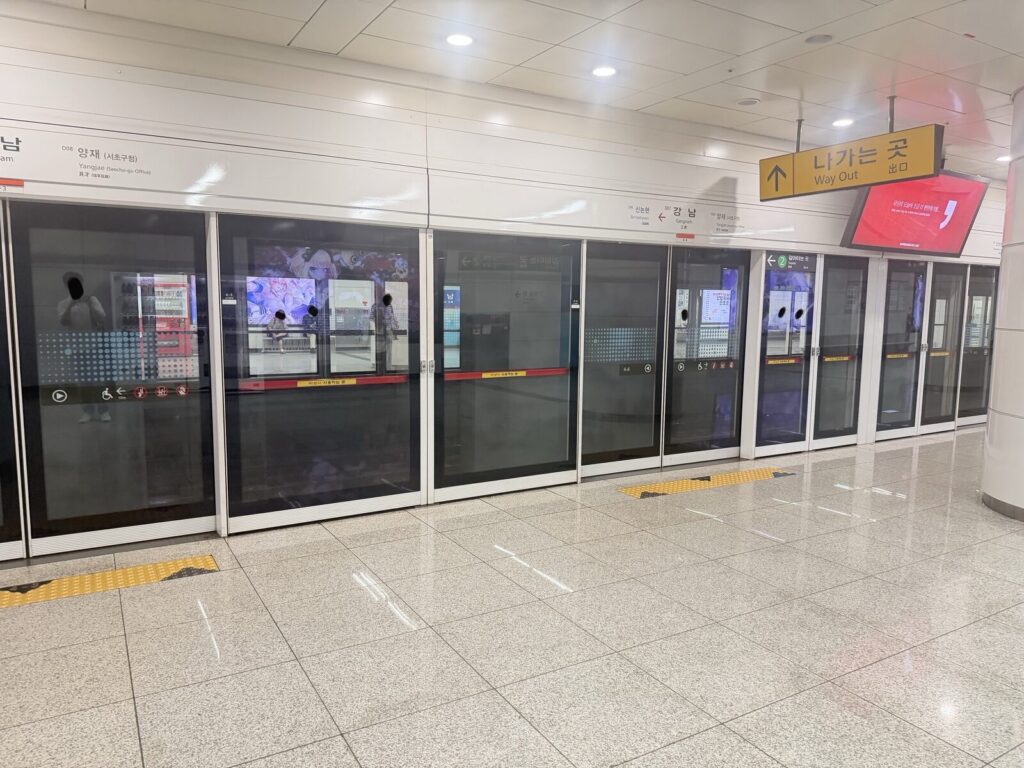
Almost every platform in Seoul now has floor-to-ceiling glass screen doors that only open once the train arrives and lines up precisely — a safety feature you’ll rarely see outside of Korea, Japan, and Singapore.
Platform screen doors keep the platform safe until the train arrives and lines up
Digital displays above the doors show the current station, the next station, and often the direction of travel. Doors are also marked with a platform/car number, worth noting if you’re trying to line up near a specific exit at your destination.
Overhead displays and transfer signage above the platform doors.
Step 6: Transferring Lines
When you need to switch lines, just follow the green 환승 / Transfer signs — they’ll tell you the line number, direction, and an estimated walking distance in meters, so you can gauge how much time to leave for a tight connection.
A Few More Things Worth Knowing
Free transfers: As long as you tap your card in and out and switch within a reasonable time window (usually around 30 minutes), moving between subway lines — and even from subway to bus — often costs no extra fare, or only a small difference.
Priority seating: Seats at the far ends of each car are strictly reserved for the elderly or disabled. You will also notice brightly colored pink seats throughout the train — these are reserved for pregnant women. It’s a strong social norm in Korea to leave all these seats empty even if the train is crowded.
Phone signal and Wi-Fi: Korea has excellent underground cell coverage, and most trains offer free Wi-Fi, so you can navigate in real time without any issue.
In an emergency: Dial 119 for ambulance/fire and 112 for police anywhere in Korea, including from inside a station. Staff booths near the gates can also help immediately if you need assistance.
Coming Up Next: Kakao Map and Naver Map
If you’ve traveled in Korea with Google Maps, you’ve probably noticed it doesn’t give walking or transit directions the way it does elsewhere — a result of Korean mapping regulations. Almost everyone here, including me, uses Naver Map or Kakao Map instead for route planning, live subway/bus arrival times, and walking directions. In the next post in this series, I’ll walk through exactly how to set these up and use them like a local before you even land.
This is the first post in a series of practical guides for visitors to Korea. I’ve since written a second post covering my visit to KHF 2026, Korea’s hospital and health-tech fair — worth a look if you’re curious what else is going on in Seoul this year.If you found this useful, look out for the next post on navigation apps — or let me know in the comments what you’d like covered next.
I promised at the end of my subway post that I’d cover this next, and I think it might actually be more important than the subway post itself. You can learn how a turnstile works in thirty seconds. Figuring out why your phone isn’t giving you directions while you’re standing on a street corner with…